
Jekyll and GitHub pages are amazing things, that they make the life of a blogger very easy where we can just focus on writing mostly, and yet have full control over the website. It is so nice that GitHub came forward and allowed us to host our websites for free using GitHub Pages project, and they do also allow for custom domains.
In case you’re looking for moving to GitHub pages with custom domain, then go read Moving to GitHub Pages for more details, and then come back here.
By default, my website will be named as sriharshachilakapati.github.io, and with this custom domain feature, I can make it appear as http://goharsha.com, but GitHub pages doesn’t offer HTTPS support for custom domains. This tutorial explains how to achieve that and how I did it exactly.
#0: The pre-requisites
Going to the pre-requisites, these are the things that I assume that you have already done:
- A GitHub pages website.
- You have associated a custom domain to it.
There is no necessary that you have sub-domains as well, but I do have different sub-domains running different websites. To be complete, I’ll give a listing of all my websites under the goharsha.com domain:
| Website | Description |
|---|---|
| goharsha.com | This website, the root |
| jgorecovery.goharsha.com | The JGO recovery location |
| silenceengine.goharsha.com | The SilenceEngine project website, static as well |
| silenceengine.goharsha.com/forum/ | The SilenceEngine forum |
| webgl4j.goharsha.com | Hosting of WebGL4J documentation |
Among these, the sub domains point to the GoDaddy server, while this blog is hosted using GitHub pages (because I’d love the Git workflow). However, this is not necessary that you should have the sub-domains. They are optional, all you need to have is the root domain that points to the GitHub pages site.
#1: Creating a CloudFlare account
The first step is to create a CloudFlare account. They gives Flexible SSL even in their free plan, and that is what I’m using. Once you have registered for an account, it will ask to add a website, and do using your non-https custom domain. In my case, I entered http://goharsha.com. Then it took time to scan my DNS records.
Do not directly proceed with the automatically generated DNS records! In my case CloudFlare missed some of my sub-domains which are present in the host original DNS. Also add all the sub-domains you are having to CloudFlare, even the sub-domains you don’t want SSL for.
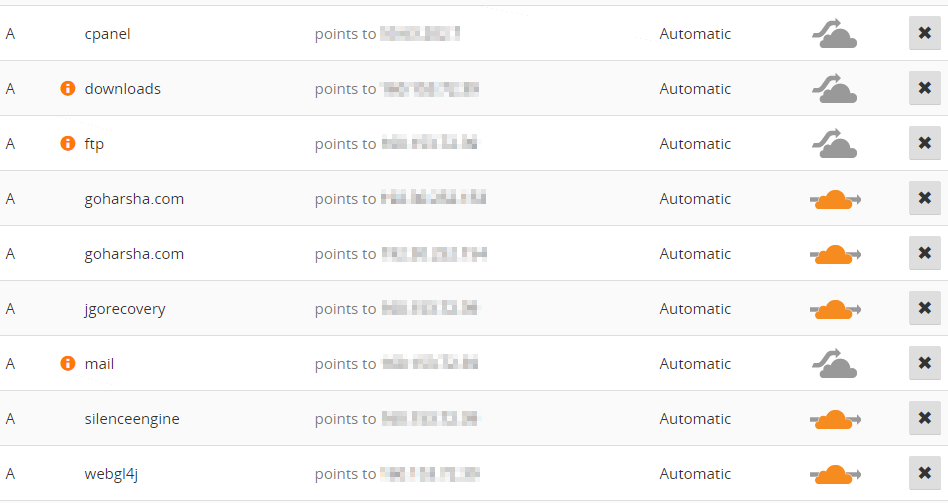
Even though there are multiple sub-domains, only click on the sub-domains you want SSL for, and make their corresponding cloud icons into orange color. For other ones, do not click them. Also more important, do not enable for the sub-domains created by c-panel, like mail, ftp, and other sub-domains, if you enable them, the services do not work until you disable SSL on them again.
You aren’t done yet, you still have to set the nameservers to the CloudFlare nameservers.
#2: Setting up nameservers and Enabling SSL
The next thing you have to do is to sign-in in your domain name provider, such as GoDaddy in my case. Then you have to find the nameservers assigned to you by CloudFlare, and set them as custom nameservers for your domain. This the is easiest step, and don’t make changes to the DNS.
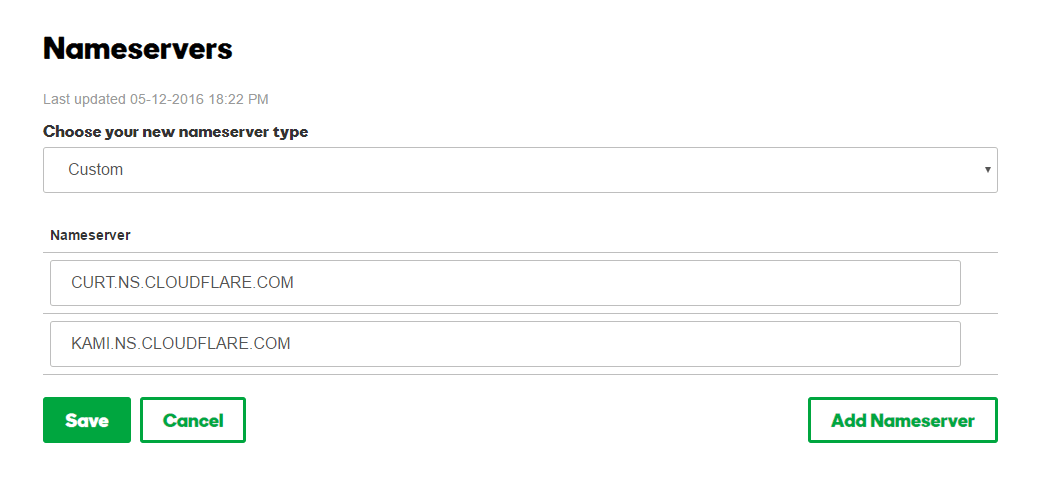
Click on save, and wait for some time. In intervals of 15 minutes, keep checking with the CloudFlare dashboard. Once it says that the verification is ready, you are ready to ask it for SSL. In the dashboard, once you are done this, go to the Crypto section. Select the SSL option there, and set it to Flexible SSL.
Note that it takes up to 24 hours for the SSL to be issued depending on the load on CloudFlare servers, but in my case, it took me 4 hours for the SSL to become activated. Now at this point, you can access your site with https and also http protocols.
#3: Routing from HTTP to HTTPS
Once you have SSL version open, you will notice that all the links in the site might point to the HTTP version, while you want the HTTPS version of your site. To do that, as the step one, change all the URLs on your site to relative URLs, that doesn’t specify the protocol. For external resources such as scripts from CDNs, use the protocol-relative addresses. Also make the changes in your sitemap so that search engines see the HTTPS version instead.
The next step is to perform the routing of requests to the HTTPS versions by default. This can be done on the client side, but also with URL rewrites on CloudFlare. First go to the Crypto section and enable the Automatic HTTPS rewrites option. Additionally you are going to add two page rules in the Page Rules section so that all the URLs will get rewritten.

There are two page rules created here: The first one redirects all the requests in the sub-domains to the HTTPS versions, and the second one redirects all the remaining requests to the HTTPS version of the main site. And with this, the configuration is finished. It takes 5 minutes for the page rules to become effective, and you also might be needed to clear the site cache. Once this is done, you have SSL successfully working as expected on your website, go enjoy!
Conclusion
As many other tutorials point out on the internet, there is no need to set the enforce_ssl global variable in the site configuration. I’ve never seen any website ever use that variable, and also I haven’t seen it in the Jekyll documentation. Next, it takes time for SSL to be enabled, so be patient. And the final thing, is that even though I mention that this is for Jekyll sites, the process is same for other sites as well. So take your sites to HTTPS now!