Introduction
Hackintosh is a way for people who want to use Mac OS X but cannot afford the high prices of the apple hardware. Hackintoshing is the process of installing Mac OS X on a non-apple computer. In this tutorial, I’m going to show you how to triple boot Mavericks, Windows 8.1 and Ubuntu 13.10 on a normal pc. Before starting with this, make sure that you have backed up all your data as this process involves a complete format of your hard disk.
The Hardware
It is true that not all the computers can work with Mac OS X. That is why you have to be so careful for choosing the parts of your PC. If you are building a new computer, then check out for the parts in the Tonymacx86.com’s awesome buyers guide of working PC parts. There is a huge collection of them and they are guaranteed to work without any problems with hackintosh. However, I’m using an old PC from 2007 with the following hardware.
- Intel Core 2 Duo ES300 @ 2.60 GHz
- ASUS P5KPL-AM/PS Motherboard
- 4 GB DDR2 Dual Channel RAM
- NVIDIA GeForce 210 1GB Graphics Card
- Seagate 250GB SATA Hard disk
- DLink DIR-300 Wireless Router (using as Ethernet modem)
- Standard USB Keyboard and Mouse
I know that this hardware list is pretty old, but it’s working pretty much fine for me. I have been hackintoshing since OS X was 10.5 and till now, I haven’t got any issues with this PC. Also I’m not using bluetooth because I don’t need it.
Required Software
To get this triple boot working, you need to have access to an existing mac or hackintosh. (If not, I recommend you to follow this guide instead which focuses on Niresh Distro. You can still follow this guide to learn to triple boot). Here is a listing of the software you need to get this done.
| Install OS X Mavericks.app | (Download from the Mac App Store) |
| myHack | (Download from myHack Guide) |
| MultiBeast | (Download from tonymacx86.com) |
| Ubuntu 64 bit ISO | (Download from ubuntu.com) |
| Windows 8.1 Pro Installer | (Purchase from Microsoft) |
After you have downloaded them, burn the Ubuntu ISO to a DVD. Using windows, you can just right click on the ISO and click Burn to DVD. Now, the real part starts. You have to create the USB installer for Mac OS X using myHack.
Preparing myHack USB
For this part, you need access to a real mac or an existing hackintosh, since myHack was a mac program. Open up the Mac App Store and download Mavericks, it’s free. If your os x is already using Mavericks, then click this app-store link from your mac to download. After downloading, you can see Install OS X Mavericks.app in the Launchpad. (Don’t click on that yet).
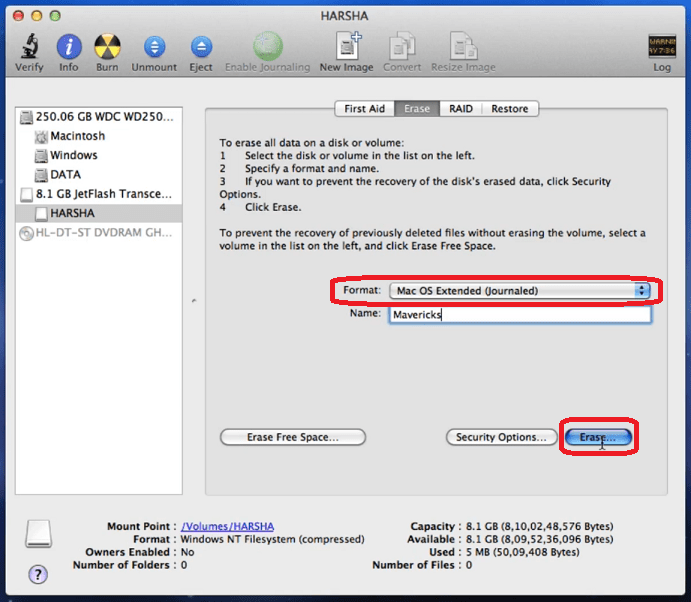
Now insert your USB (should be 8 GB or more in capacity). Then from the Disk Utility, erase the entire drive using Mac OS Extended (Journaled) and erase it. You can name the USB anything, it will be changed automatically by the myHack. Now start myHack application and enter your password. Your screen should now look like this.
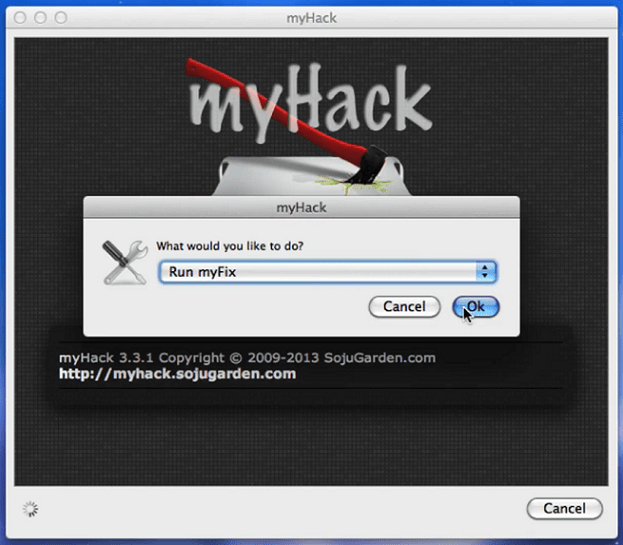
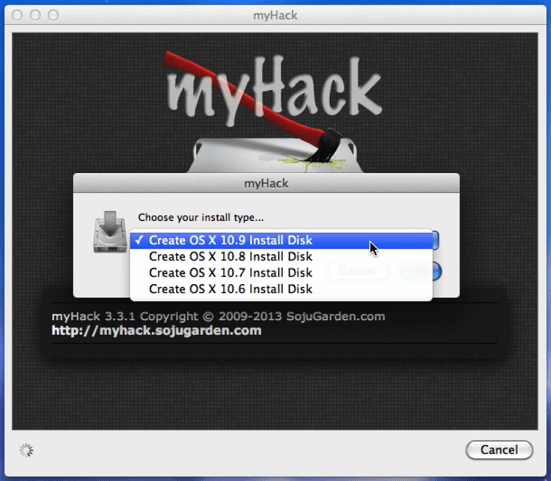
myHack opens and shows you with a set of options to do. Select Create OS X Installer from the drop-down menu and select Create OS X 10.9 Install Disk. It now asks for the location of the installer you downloaded from the appstore. Here, select Browse Manually and select the file /Applications/Install OS X Mavericks.app. Now, myHack starts working and creates a modified bootable version of the installer on the USB we’ve inserted.
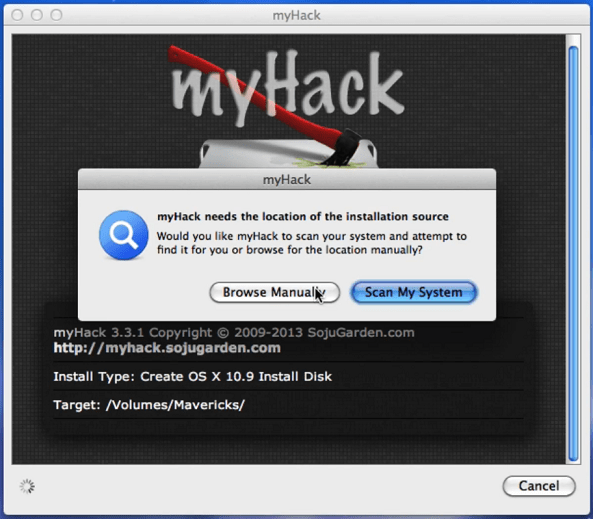
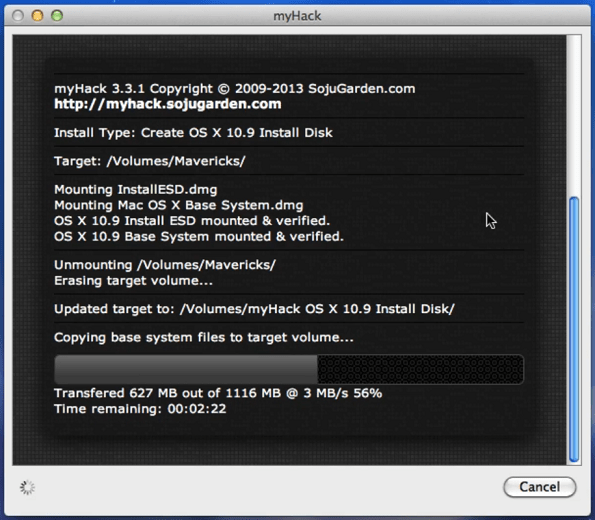
Make sure you patch the installer for MBR support, that is what we will be using to install to make triple booting easy (It didn’t work out when I tried with GUID. So I selected MBR). That process takes around half-an-hour to complete. Now, the actual process begins.
Configuring BIOS
This is the most important step in installing a hackintosh. If your BIOS is not configured for hackintosh, then it is not likely going to work out of the box. However, fortunately this is so easy. All you have to do is change IDE/SATA Mode to AHCI and set the HPET Mode to 64 bit. If you find this confusing, you can google for a hackintosh bios guide for your motherboard. If you have the same BIOS as me (American Megatrends Inc., 0412), then you can follow this video.
If you are having a modern EFI/UEFI system, then you have to change Boot Mode to Legacy. Mixed mode will not work with the hackintosh. That’s all to the BIOS configuration. All you have to do now, is to boot and proceed with the install. First, we will install Mavericks, then Windows and later Ubuntu. Finally we install the Bootloader to boot all the three operating systems.
Installing Mavericks
Before installing, make sure you remove all the peripherals except the necessary ones like mouse, keyboard and monitor. You can re-connect speakers, webcam and microphone later. Now insert the myHack USB and start your computer. When it starts to boot, boot from the USB. (Some motherboard manufacturers requires you to press a key such as F8). It would take a few seconds and you will be presented with the myHack menu. Just press Enter and select the installer and press Enter again. It takes a few minutes to arrive at the welcome screen.
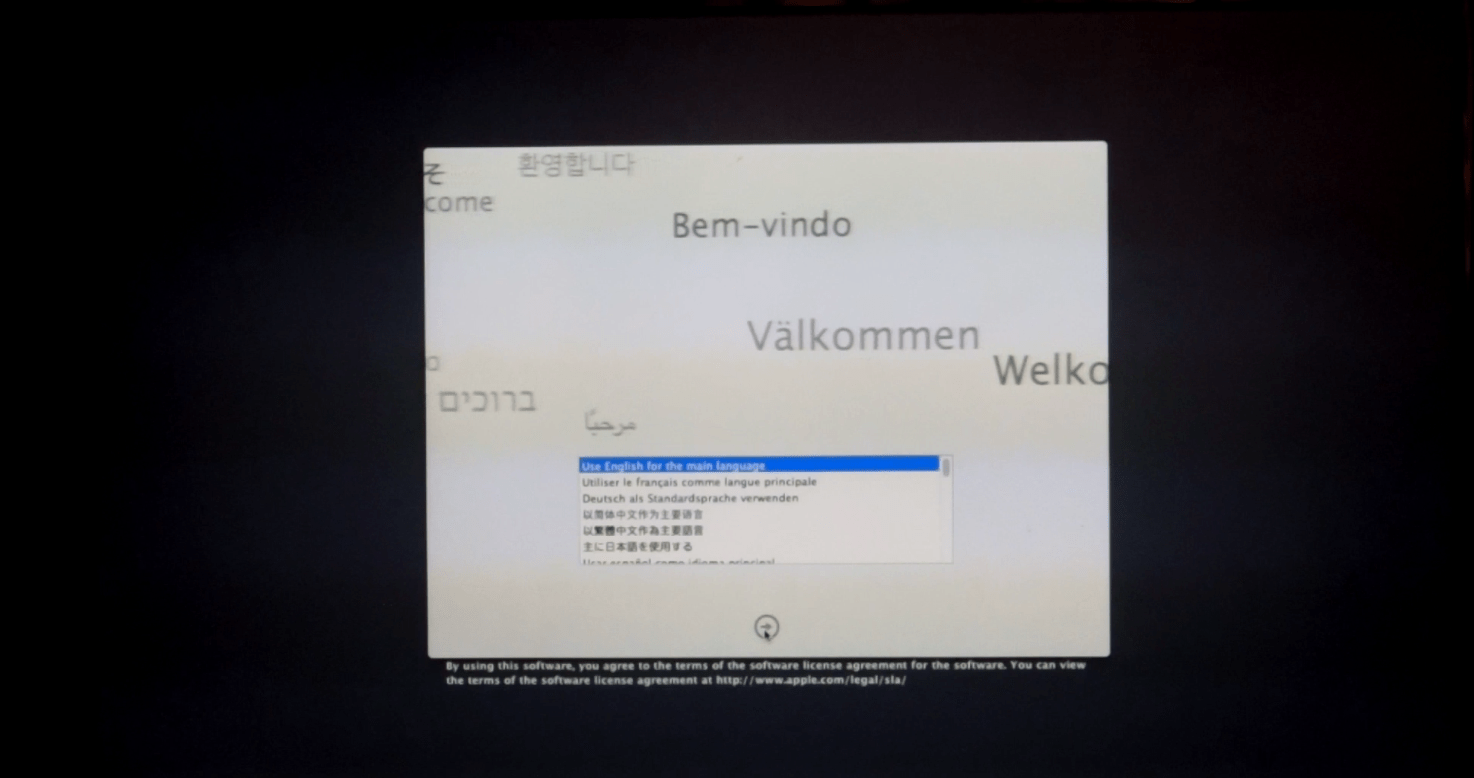
Click that arrow and wait for a few moments. Then open Disk Utility from the Utilities menu. Here, we are going to format the hard disk and make it into partitions. Since we are thinking of three operating systems, you should have four partitions. Three partitions for the operating systems and the fourth one is meant to share the data between the operating systems. We format the first one as Mac OS Extended (Journaled) and leave the others as MS-DOS FAT. Now, click on Options button and select Master Boot Record as the partition scheme. Click Apply and you will be done formatting your hard disk.
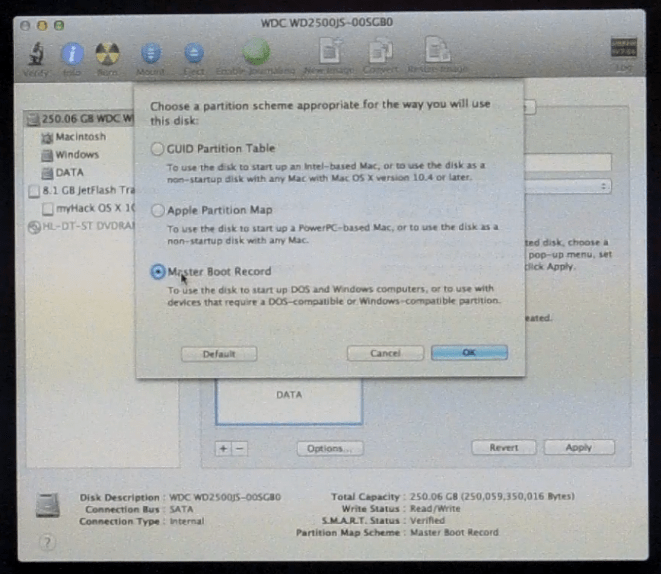
Once you have formatted the hard disk, quit the Disk Utility and proceed with the installation on the Mavericks partition we have just created. The installation will take place for some time (usually less than half-an-hour) and at the end of the installation, myHack will start by itself and starts patching the install to make it work with hackintosh. It will ask you to remove some kext files, be sure to click YES for all of them, they are completely unnecessary. And finally, it installs the bootloader and asks for a restart. After restarting, you will be presented with installation to set up your user account information. Don’t mess any of the advanced options here, just fill up the required fields and continue.
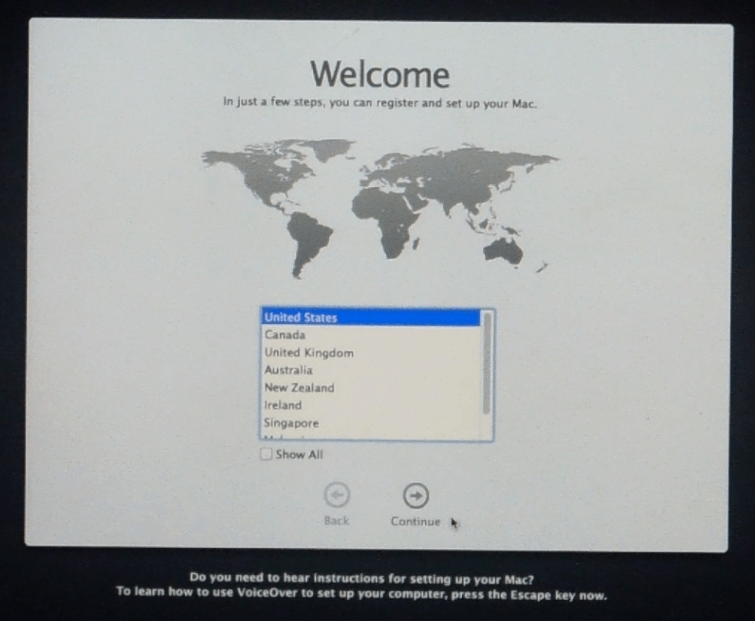
Just fill out all the required information and you will be at your desktop in minutes. At this point, you can connect your speakers, additional USB devices and others to check everything is working. If anything is not working, then you need some third-party kexts to enable that behaviour. I had found myself that ethernet was not working. So I ran MultiBeast and installed the Lnx2Mac Ethernet driver and everything was working. If you installed OS X on an SSD, you have to install TRIM Enabler. You can do that from both myHack and MultiBeast.
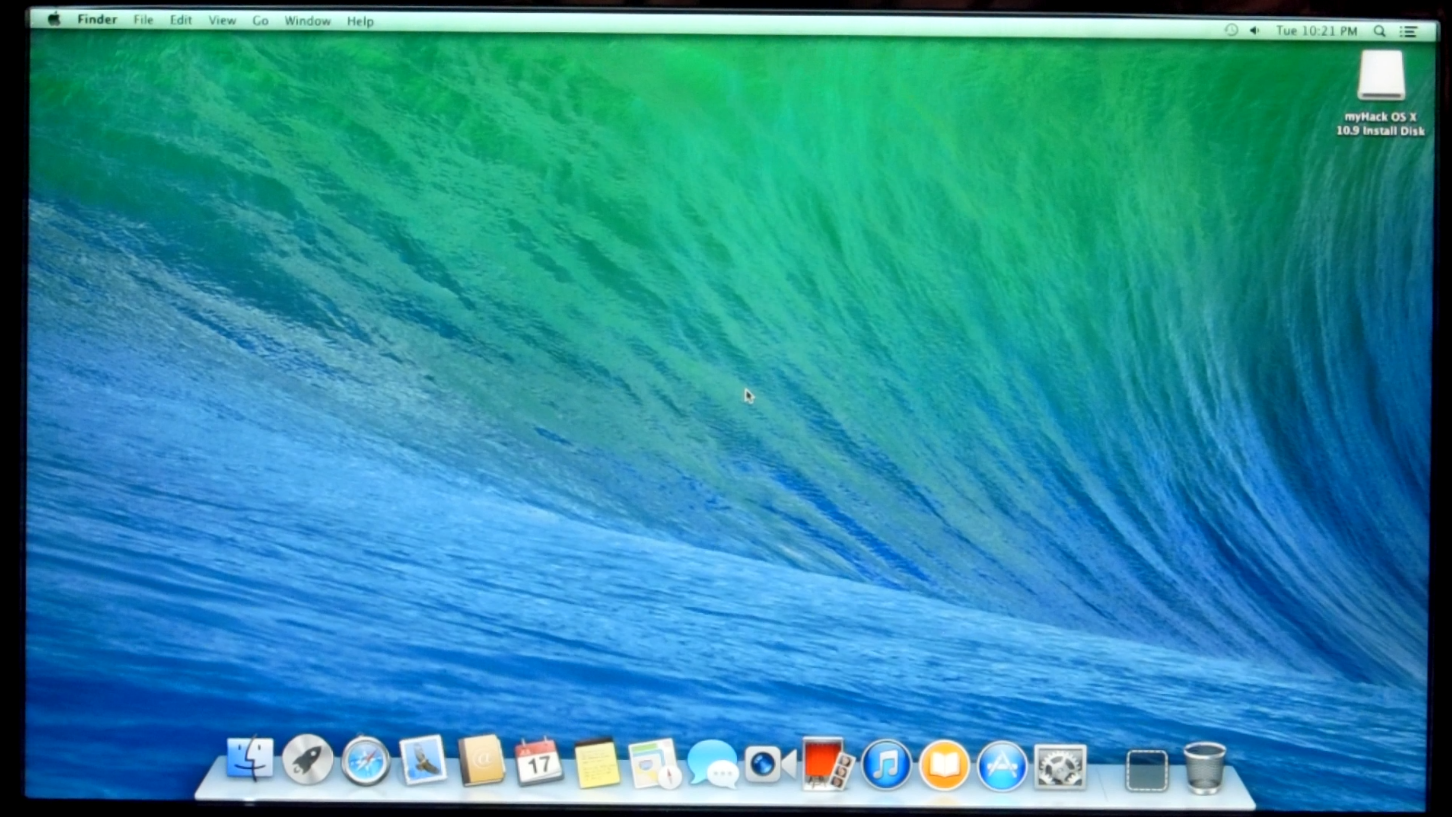
With this, we have completed installing mavericks. If you have messed around in the video, you will notice that the mouse scrolls in the opposite direction. This is because of the natural scrolling feature of Mavericks. Go to System Preferences and Mouse and just untick the Natural scroll option to disable that feature. For normal keyboards, Alt key functions as Command and Super-Key (the one that has windows logo on it) will behave as Option Key. The Control, Shift and other keys function normally. Now, we’ll get into the other part, installing Windows.
Installing Windows
Installing Windows is really easy, just because our PCs natively support it. Shutdown your hackintosh and now, insert your Windows installer disk into the DVD drive. Instead of messing with the partitions, just install windows to the second partition in the partition list. Just select that and proceed with the install. This installation will take almost 15 minutes.
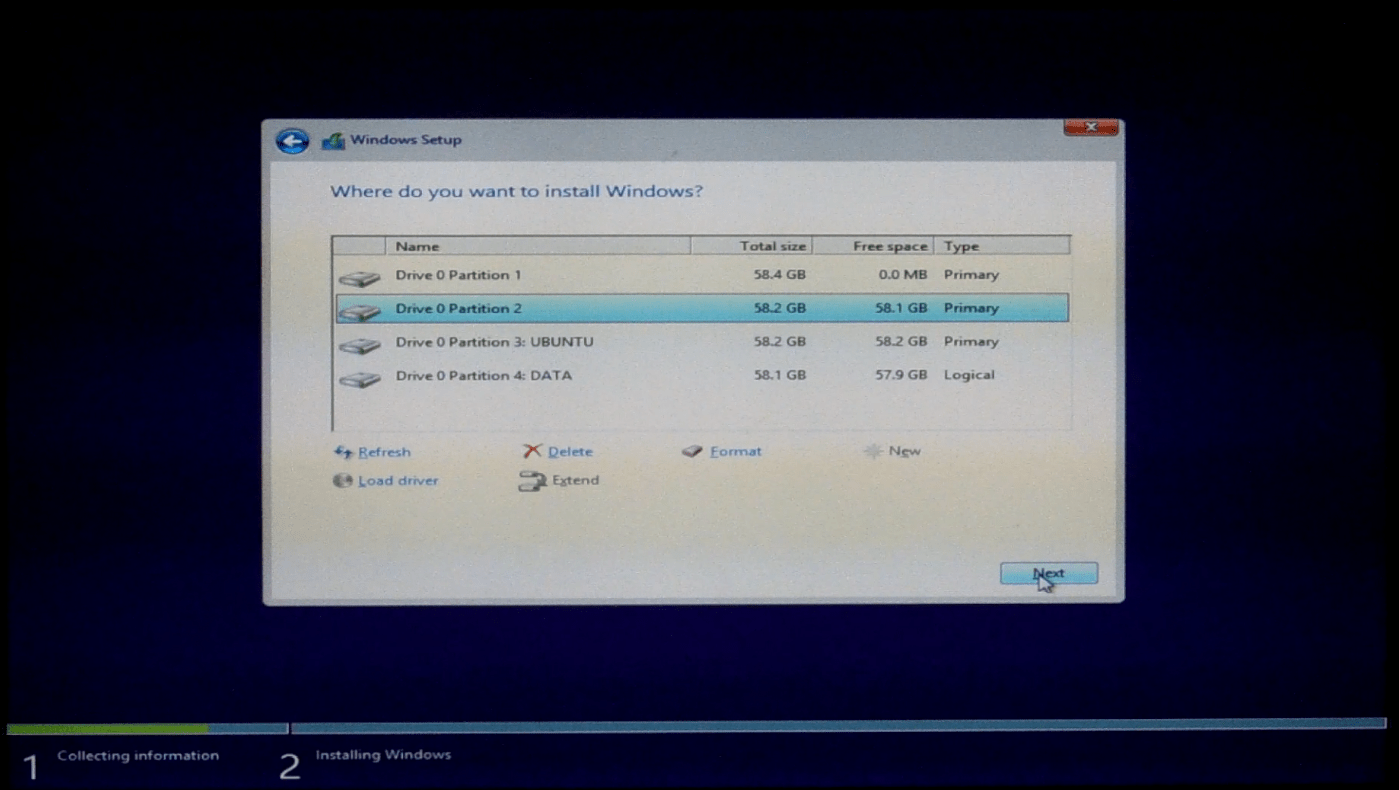
After installing Windows, you can’t access Mavericks, because Windows installs its bootloader on top of the Chameleon bootloader which is required to boot Mavericks. Don’t worry though, we will fix that after installing Ubuntu. After I got to the desktop, I had installed my drivers before proceeding with the Ubuntu installation. If you doesn’t need Ubuntu, then you can simply skip it’s installation.
Installing Ubuntu
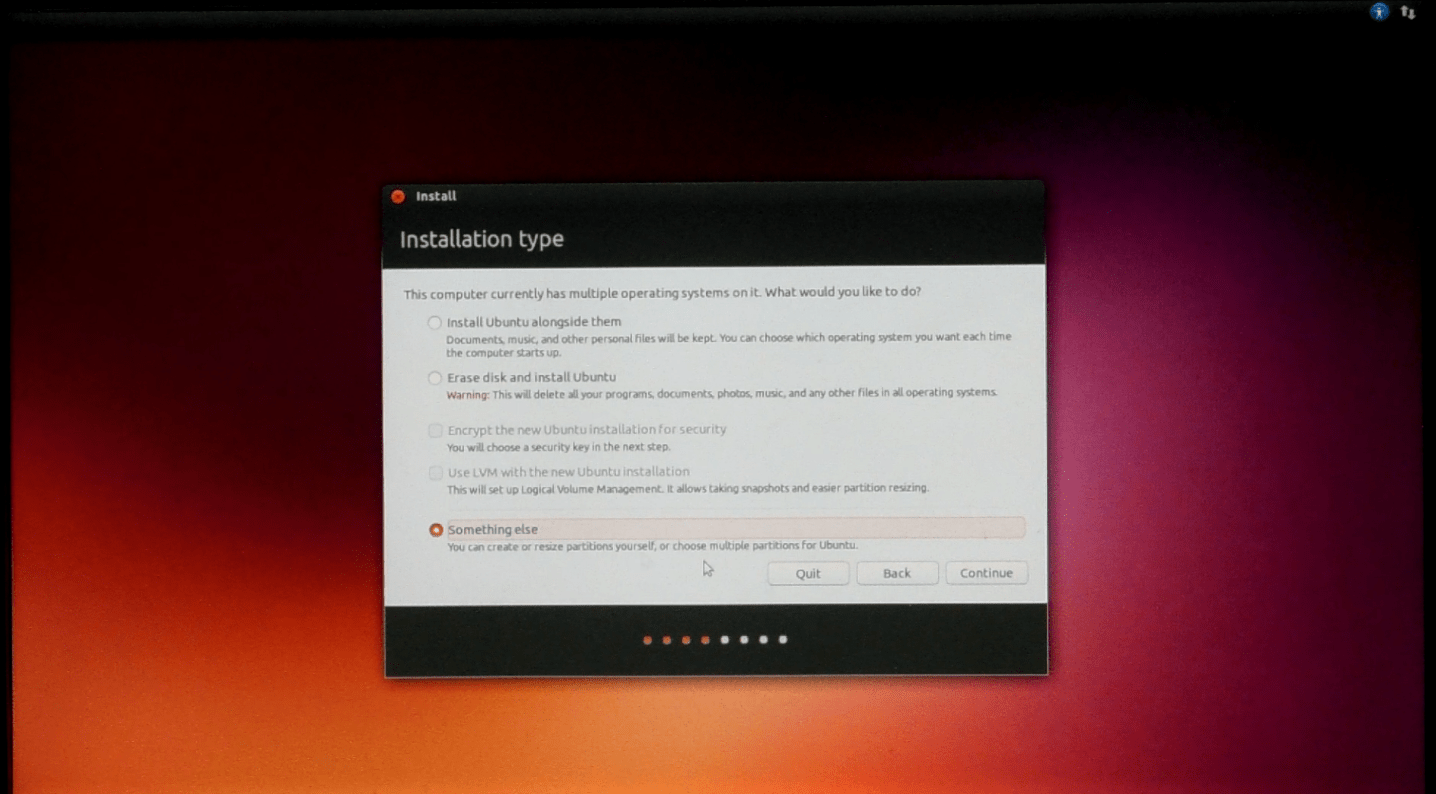
Now, that we have Mavericks and Windows setup, it is now time to install the third operating system on the list, Ubuntu. Reboot your system with Ubuntu installer in the DVD drive (Never install using wubi because it gets you into problems with triple boot later) and boot your computer using it. When it reached the screen asking you to try or install ubuntu, choose to install. You will be shown three options here - install alongside Windows, Erase disk and install Ubuntu and Something else. It is clear that we do not want the first two options, so go and select Something Else.
Next, you will be presented with a list of partitions. This is where you have to be extremely careful. Any wrong option can cause the system not to boot and you have to start over from the beginning. So be careful with your steps. As you can see in the image below, the first partition is where Mavericks is installed. In the second partition, we have installed Windows. The third partition is what we have reserved for Ubuntu, so select that partition. Now, change the location of bootloader installation to the same third partition where we are going to install ubuntu. Now, click on the Change button and change the format to Ext4 Journaling Filesystem and set the mount point to /. Forgetting these will make ubuntu non-bootable.
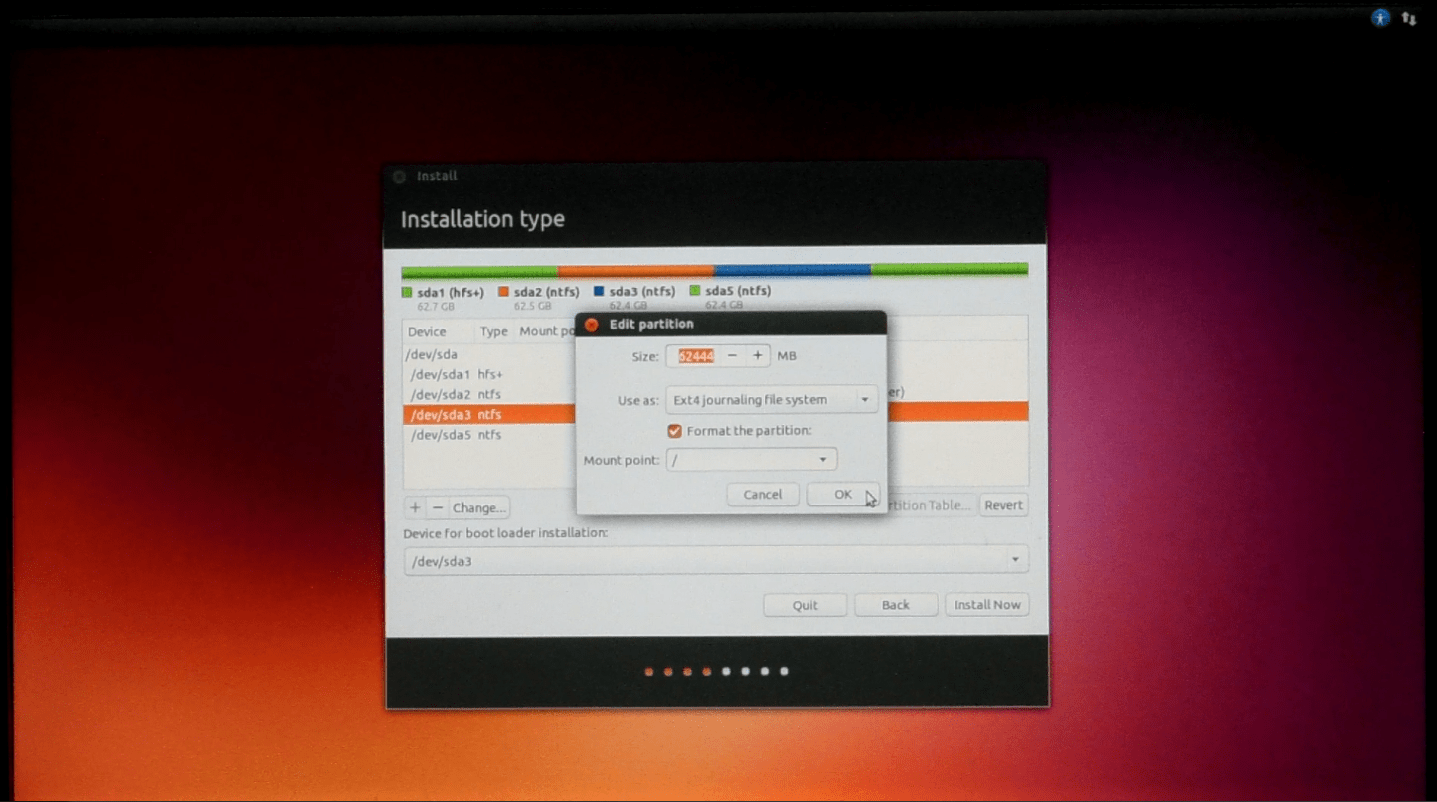
Now proceed with the installation. This installation can take upto 30 minutes, as ubuntu will try to download some updates. After the installation completes, you see the GRUB bootloader on the start. Phew, we’ve did a lot of work to get to this point. The only thing left for us is to fix the Chameleon bootloader and get all the three operating systems working.
Fixing Chameleon Bootloader
The actual way (as shown in the video) involves us to boot into windows and make the Mavericks partition as Active. However, that option will be grayed out on some PC’s so, here is a workaround and a more easier way to do that. Insert the myHack USB again and at the boot menu, quickly press Enter and this time, select your Mavericks partition. This allows you to boot into Mavericks. Now, launch myHack from the Launchpad. After entering your password, select Install Chameleon. This automatically makes your Mavericks partition active and reinstalls Chameleon. And that’s it, enjoy your new triple booting machine.
